[Node.js] Pug - mixin을 활용한 파일 정리
2021. 10. 20. 16:15 - 프론트맨
Pug에서는 데이터를 불러와서 바로 html에 출력할 수 있다.
그러나 만약 데이터를 처리하는 부분이 길어진다면 코드가 복잡해질 것이다.
이럴 때 mixin을 사용해서 코드를 파일로 분리할 수가 있다.
단순히 코드 블록을 include 하는 것과의 차이점은
mixin은 데이터를 다룬다는 것이다.
마치 함수를 만드는 것과 같다.
다음은 사람의 프로필을 출력하는 페이지이다.
// main.js

import express from "express";
const app = express();

const profiles = [ 	// 프로필 생성
  { name: "민석", age: "21", height: 175, job: "백수" },
  { name: "상윤", age: "21", height: 173, job: "프로게이머" },
  { name: "동희", age: "22", height: 180, job: "군인" },
];

const profile = (req, res) => {
  return res.render("profile", { profiles }); // profile.pug에 profiles 넘겨줌
};

app.get("/profile", profile);
app.set("view engine", "pug");

app.listen(4000, () => {});
변수 profiles에 프로필을 object 형태로 저장하고
profile.pug 파일에 넘겨주었다.
이제 profile.pug에서 반복문으로 프로필을 출력한다.
// profile.pug

doctype html
html(lang="en")
    head
        title profile
    body
        each profile in profiles
            div
                h3 #{profile.name}
                ul
                    li 나이: #{profile.age}
                    li 키: #{profile.height}
                    li 직업: #{profile.job}
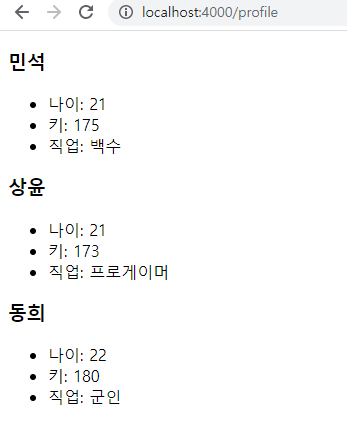
Pug에서는 each in 을 사용해서 배열이나 객체에 접근할 수 있다.
출력 결과
↓

여기서 mixin을 사용하면 파일로 나눌 수가 있다.
// controllProfile.pug

mixin controllProfile(profile)
    div
        h3 #{profile.name}
        ul
            li 나이: #{profile.age}
            li 키: #{profile.height}
            li 직업: #{profile.job}
mixin 함수명(매개변수) 형식으로 사용한다.
함수 선언과 비슷하다.
그리고 작성한 mixin 파일을 불러오면 된다.
// profile.pug

include controllProfile

doctype html
html(lang="en")
    head
        title profile
    body
        each profile in profiles
            +controllProfile(profile)
위에서 mixin 파일을 include 하고
아래에서 +함수명(매개변수) 형식으로 함수를 호출하면 끝이다.
결과 화면
↓
웹사이트가 커질수록 데이터베이스도 점점 커지게 된다.
그럴 때 mixin 기능을 잘 활용하면 깔끔하게 코드를 작성할 수 있을 것이다.
'Programming > Node.js' 카테고리의 다른 글
| MongoDB 데이터 생성, 삭제하는 방법 (0) | 2021.10.23 |
|---|---|
| [Node.js] Mongoose 설치하기 (0) | 2021.10.20 |
| [Node.js] Pug - partial (복붙 최소화하기) (0) | 2021.10.20 |
| [Node.js] Pug 라이브러리 설치 및 사용법 (0) | 2021.10.19 |
| [Node.js] express - Router로 파일 정리하기(3. 코드 작성) (0) | 2021.10.17 |